| ThunderNerd | Project Home |
iDell Optiplex Hackintosh
How to install OS X 10.7 Lion on a Dell 755/760
Next page here.
|
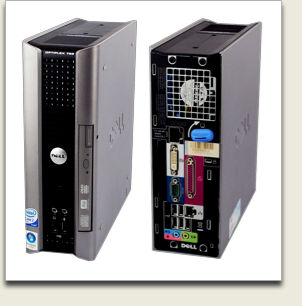
Why Dell? Dell have the good sense to use a lot of the same hardware as Apple. Lenovo might be bigger and better, but they are harder to Hackintosh. Why
755/760?
They are currently available by the pallet load as part of the enterprise upgrade cycle. Try your local auction/reseller or plentiful on eBay. Don't outbid me, it's bad karma. With RAM and HD expect to pay less than $100. Why USFF? This guide is for the baby 755 USFF which you should be able to find for less than $50. It's small, powerful for its day and makes a great spare/backup/kid machine. Main disadvantage is no slots which means we are stuck with the cheesy Intel GX3000 GPU on the motherboard and 1280x800 or 1280x1024. More about that later. If you need more pixels than 1280 then the USFF is not for you, get a larger box and a real graphics card. Which Brain/Configuration? Don't buy anything less than Core 2 Duo. RAM:
1 GB will work, 2 GB would be
a sensible minimum; depends on your use.
HD: Most USFFs come with 80 GB; upgrade to your requirements. If you buy a wholesale lot and end up with a Pentium, then MacBuntu is your friend: here. Why Lion? These machines have some 32 bit hardware so it's easier with a 32/64 OS. Later operating systems can be made to work, but it's hardly worth the effort. |
||||
|
||||
|
1) Prepare the Thumbdrive
Download Lion and iAtKos L2. Apple's OS and software suites (from Mavericks on) are free on any suitable Mac, but Lion remains a token $20. If you own a recent Mac you may have bought Lion and are free to download your purchase again and use on other machines (up to five I think). Otherwise you get to buy Lion for $20. Yes, it's more than Linux, but if you think $20 is expensive, try asking Microsoft for a free copy of Windows 8 and MS Office for your five-year-old Dell :) Format and load the thumbdrive. If you're familiar with OS X this is straightforward. Run iAtKos and install on the Thumbdrive. There are guides for this online if you're stuck. While that lot is loading let's prepare the Dell. |
||||
|
2) Dell Pre-Op
|
||||
| 3)
Update the BIOS By far the easiest way is to bring the computer up in Windoze from hard disk. If you're really lucky the HD will boot straight up in XP or Win7. If you're unlucky it will come up in Vista :( If not, then you get to babysit another Windows install, just like old times. To update the BIOS, run the Dell O755-A22.exe (or later) utility from here. And now the hardware is ready. |
||||
|
|


